

Introduction
Installing a new vacuum pump is a critical task that directly impacts the performance, safety, and longevity of a vehicle’s braking and emission systems. For workshops, fleet managers, and procurement specialists handling high-value European and Japanese vehicles, a flawless installation is non-negotiable. A poorly fitted pump can lead to vacuum leaks, reduced brake booster efficiency, and ultimately, compromised vehicle safety. This guide provides a detailed, step-by-step walkthrough for vacuum pump installation across popular brands like BMW, Audi, Volkswagen, Mercedes-Benz, Opel, Mazda, as well as Ford vans and Isuzu trucks. We will cover everything from preparation to final testing, ensuring your team gets it right the first time, every time. By following these professional procedures and using a high-quality pump from ATOSPUMPS, you guarantee the deep ultimate vacuum and rapid pump-down time your operations demand.
Why Proper Vacuum Pump Installation Matters
A vacuum pump is not a simple bolt-on component; it is a precision-engineered device that generates the negative pressure essential for brake servo assistance, turbocharger actuator control, and exhaust gas recirculation systems. Incorrect vacuum pump installation can cause immediate and catastrophic failure. If the pump is not seated correctly, the drive coupling may misalign, leading to premature wear, noisy operation, and a complete loss of vacuum. For a procurement director sourcing pumps for a fleet of Mercedes-Benz Sprinter vans or Isuzu trucks, the cost of a bad installation is not just the price of a replacement pump—it’s vehicle downtime, lost productivity, and a potential safety risk on the road. Proper installation unlocks the full potential of ATOSPUMPS’ rapid pump-down time and ensures the quiet, low-vibration operation that technicians appreciate. It is the foundation for long-term reliability and validates your investment in CE and ISO 9001 certified components.
Pre-Installation Preparation and Tools
Before you begin the vacuum pump installation, gather the necessary tools and consult the vehicle-specific service manual. While exact steps vary slightly between a BMW 3 Series, an Audi A4, a VW Golf, an Opel Insignia, or a Mazda CX-5, the core principles remain consistent.
- Required Tools: A torque wrench, a set of sockets and extension bars, flathead and Phillips screwdrivers, a gasket scraper, a clean lint-free cloth, and the correct replacement gasket or O-ring (always replace, never reuse). For Mercedes-Benz and Ford vans, you may need E-Torx sockets. For Isuzu trucks, larger drive adapters might be required.
- Safety First: Disconnect the vehicle’s battery. Allow the engine to cool completely. Wear safety glasses and gloves.
- Clean the Work Area: The mating surface on the engine block or cylinder head must be surgically clean. Any debris or old gasket material will cause a vacuum leak. Use a gasket scraper carefully to avoid scoring the aluminum surface, then wipe with a solvent cleaner and the lint-free cloth.
Step-by-Step Vacuum Pump Installation Process
- Remove the Old Pump: Locate the vacuum pump on the engine. It is typically driven by the camshaft or an auxiliary shaft. Disconnect the vacuum hose by loosening the clamp and gently twisting the hose off. Remove the fastening bolts. Note the orientation of any brackets or brackets for reinstallation. Withdraw the old pump carefully, catching any residual oil.
- Inspect and Clean: Examine the drive interface on the engine. Look for wear, cracks, or metal shavings. Clean the mating surface thoroughly. Inspect the vacuum line for cracks or blockages. A clogged line can destroy a new pump.
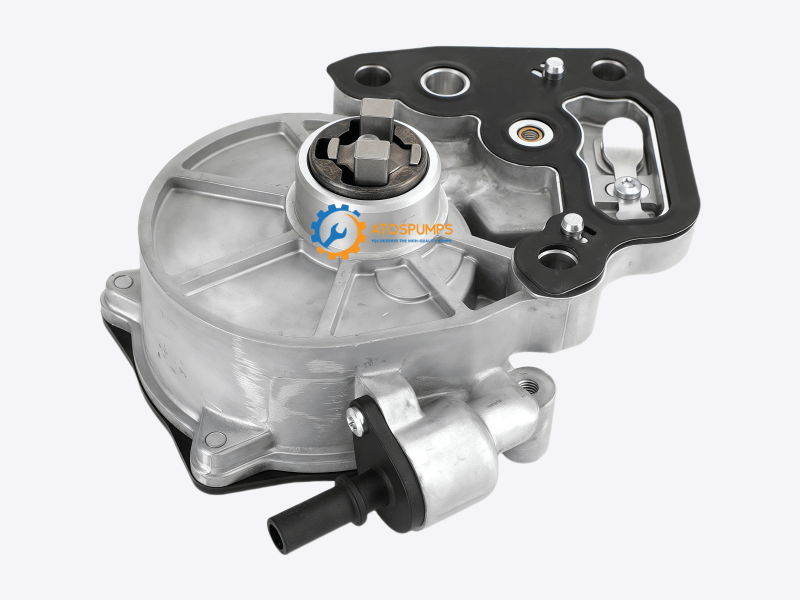
- Prepare the New ATOSPUMPS Pump: Remove the new vacuum pump from its protective packaging. Do not remove the protective port covers until the moment of connection. If the pump requires pre-filling with clean engine oil, do so according to the supplied instruction sheet. Most ATOSPUMPS automotive vacuum pumps are splash-lubricated and do not need priming, but always verify. Position the new gasket or O-ring. A light smear of approved sealant is sometimes advised, but never use excessive sealant that can squeeze out and block oil passages.
- Mount the Pump: Align the pump with the drive slot or gear. Never force it; it should slide into place with minimal resistance. Forcing it indicates a misalignment that will damage the pump and engine. Hand-start all mounting bolts to prevent cross-threading.
- Torque to Specification: Using your calibrated torque wrench, tighten the bolts in a star pattern and in stages to the manufacturer’s specified torque. This is critical. An over-tightened bolt can distort the pump housing, leading to internal contact and failure. An under-tightened bolt will cause an oil and vacuum leak. A typical torque range for a passenger car vacuum pump is 8–12 Nm, but always confirm with the engine manual. For trucks like Isuzu, the torque figure will be higher.
- Reconnect Vacuum Line: Remove the protective cap and immediately connect the vacuum hose. Tighten the clamp securely. Ensure there is no strain on the hose.
Common Installation Mistakes to Avoid
A surprising number of field failures are traced back to avoidable errors during vacuum pump installation. The most common is reusing a hardened, compressed old gasket that cannot seal. Another is ignoring the condition of the vacuum hose; a collapsed internal liner can mimic a pump failure, leading to a misdiagnosis and an unnecessary replacement. For turbocharged vehicles like many BMW, Audi, and VW models, failing to properly route the hose away from hot turbo components can cause the line to melt. Also, never start an engine after installation without first checking the oil level, as some oil loss during pump removal is normal. With ATOSPUMPS’ dedication to quality, preventing these mistakes keeps your fleet running at peak efficiency.
Post-Installation Testing and Verification
After the vacuum pump installation is complete, reconnect the battery and start the engine. Listen immediately for any abnormal noise. A properly installed ATOSPUMPS pump runs with quiet, low-vibration operation. If you hear a knocking or whining sound, shut off the engine and re-inspect. Check the brake pedal feel; it should be firm and responsive, with no excessive travel. Use a vacuum gauge to verify that the pump achieves its deep ultimate vacuum quickly—typically within seconds of start-up. Finally, visually inspect the mounting flange for oil or vacuum leaks. The rapid pump-down time you now experience is a direct result of the pump’s precision engineering and your correct installation. For procurement managers overseeing a large inventory, documenting this verification process for each vehicle ensures your maintenance program is robust and defensible.
Conclusion
A successful vacuum pump installation is the sum of meticulous preparation, correct technique, and a premium component. By following this guide for your BMW, Audi, Volkswagen, Mercedes-Benz, Opel, Mazda, Ford, and Isuzu vehicles, you protect your investment and maximize uptime. ATOSPUMPS’ CE and ISO 9001 certified pumps, with their deep ultimate vacuum, rapid pump-down time, and quiet operation, are the superior choice for automotive professionals who refuse to compromise.
Ready to source vacuum pumps engineered for a perfect fit and durable performance? Contact us now to check our vacuum pumps which you are looking for, or start a live chat on our website for immediate assistance. For bulk inquiries from the UAE, Saudi Arabia, South Africa, or the Americas, reach out via WhatsApp or email for exclusive wholesale pricing and to request a product catalog.