

Introduction: Get It Right the First Time
Installing a new vacuum pump on a Mercedes Benz van, a BMW auto car, or a FORD van isn’t complicated, but it is unforgiving of shortcuts. ATOSPUMPS provides an oil-free, robust unit that will deliver years of service, but only if the OEM vacuum pump replacement or aftermarket vacuum pump upgrade is fitted correctly. Whether you’re a workshop in Mexico, a fleet maintenance facility in South Africa, or a retailer supplying garages in the UAE, this vacuum pump installation guide will ensure that every pump you touch performs to its full potential from the first brake pedal press. We’ll cover pre-installation checks, precise mounting, connection integrity, and critical post-installation tests that confirm everything is right.
The Hidden Pitfalls of Incorrect Installation
An improperly installed vacuum pump might produce some vacuum, but underlying mistakes will shorten its life dramatically. Common errors include reusing a failed gasket that leaks, misaligning the drive coupling which puts side load on the pump bearing, pinching the vacuum hose that creates a restriction, or forgetting to transfer a required O-ring. On an ISUZU truck or Dodge Pick-up, the pump may be gear-driven off the engine; incorrect bolt torque can lead to gear tooth damage. ATOSPUMPS has seen brand-new pumps returned with scored internals because the installer didn’t clean debris from the intake port. This guide eliminates those risks.
Pre-Installation: Prepare the Engine and Check Components
Verify Part Number and Visual Match
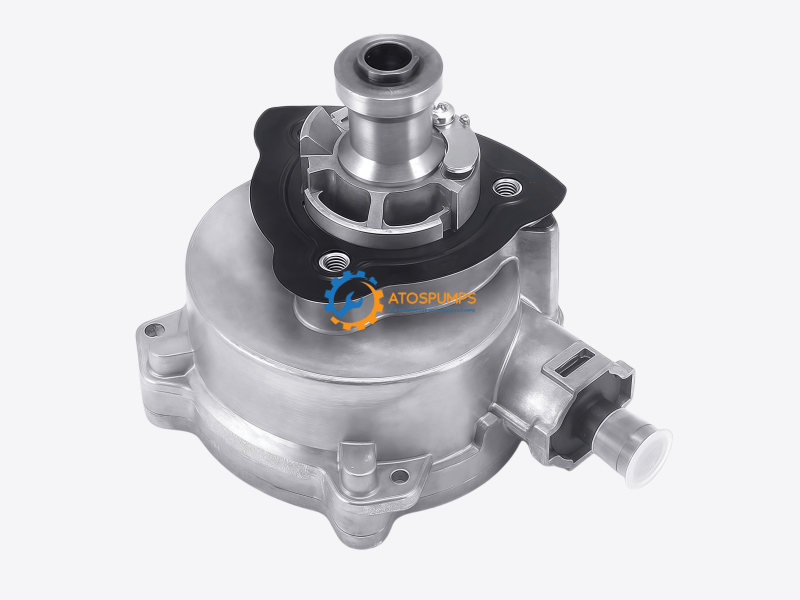
Before removing the old pump, place the new ATOSPUMPS vacuum pump next to it. Compare the mounting flange, vacuum port location, drive interface, and any electrical connector. Our pumps cover MAZDA auto cars, OPEL auto cars, Mercedes Benz auto cars and vans, ISUZU trucks, FORD vans, Dodge Pick-ups, and BMW auto cars. The visual match should be exact. If anything looks different, contact us before proceeding.
Clean the Mounting Surface and Surrounding Area
Remove any remnants of the old gasket using a plastic scraper. Avoid gouging the aluminum surface. Wipe the area with brake cleaner to remove oil and dirt. On a Mercedes Benz Sprinter van, pay special attention to the camshaft-driven pump seat; any old sealant must be fully removed. Cover any open ports with lint-free cloth to prevent foreign objects from falling into the engine.
Inspect the Drive Interface
If the pump is driven by a coupling, spline, or camshaft lobe, check for wear. A worn drive adapter can cause misalignment and vibration. Replace if necessary. The new ATOSPUMPS pump includes a new O-ring or gasket in the box; use it.
Step-by-Step Vacuum Pump Installation Procedure
Step 1: Pre-Lube (If Specified)
Our oil-free design requires no oil, but some pumps have a sealed bearing. No additional lubrication is needed. Do not add oil. Simply ensure the pump’s interior is clean.
Step 2: Mount the Pump and Torque Bolts Evenly
Position the new gasket or O-ring. Hand-start all bolts. Tighten them in a crisscross pattern to the torque specified in the vehicle service manual. Over-tightening can crack the aluminum housing. Under-tightening can cause a vacuum leak or loose pump. On a FORD Transit van or BMW diesel, the torque is typically between 20-30 Nm; use a calibrated wrench.
Step 3: Connect Vacuum Lines and Check Valve
Attach the vacuum hose to the pump outlet. Use new hose clamps if the original spring clamps have weakened. Ensure the hose is not kinked. If the pump has an integrated check valve, verify it is oriented correctly (arrow towards pump or as marked). An incorrectly installed check valve will block vacuum flow. On an OPEL car or MAZDA, the line routing is tight; double-check clearance.
Step 4: Install Inlet Filter/Silencer
If your pump has a remote or integrated intake filter, make sure it’s clean and properly seated. Never run the pump without this filter, as it prevents dust ingestion that would destroy the dry running mechanism.
Step 5: Electrical Connection (Electric Pumps)
For electrically driven vacuum pumps on some Mercedes Benz and BMW models, plug in the connector securely. Apply dielectric grease to prevent corrosion. Route the wire harness away from hot or moving parts.
Step 6: Initial Run and Vacuum Test
Start the engine and let it idle. Immediately listen for unusual noise. Place your finger over the vacuum inlet (if accessible) to feel suction. Connect a vacuum gauge to the system and verify the pump pulls down to specified vacuum within 5-10 seconds. On an ISUZU truck, the vacuum warning light on the dash should extinguish quickly. Cycle the brake pedal several times; the pump should recover vacuum rapidly.
Step 7: Leak Check
Spray soapy water around the mounting flange and hose connections. No bubbles should appear. A leaking pump base gasket will draw in unfiltered air and debris, causing internal wear. Retighten if necessary.
Why Our Pump Tolerates High Under-Hood Temperatures Better
ATOSPUMPS vacuum pumps feature robust construction that withstands continuous operation and harsh chemical exposure. The dry-running carbon vanes do not coke with heat, and the housing materials are selected to maintain dimensional stability even when mounted near a turbocharger or exhaust manifold. This means that after a correct vacuum pump installation, you don’t have to worry about thermal distortion causing internal binding—a common issue with cheaper pumps.
Integration with Vehicle Systems
On vehicles like the Dodge RAM with a diesel engine, the vacuum pump also supplies vacuum to the turbocharger actuator and EGR system. Ensure all ancillary vacuum lines are reconnected and leak-free. A single disconnected line to the EGR valve can cause the pump to run continuously, leading to premature wear. On Mercedes Benz vans with electric vacuum pumps, the ECU often monitors pump runtime; clear any fault codes after installation to avoid false error lights.
Global Support When You Need It
ATOSPUMPS supports workshops and retailers worldwide. If a mechanic in Brazil encounters a question installing a pump on a MAZDA BT-50 or a fleet manager in Oman needs clarity on an ISUZU NQR, our engineers can guide them via video call. We provide wiring diagrams and torque specs for all covered models upon request.
Install with Confidence, Order Your Pump Now
Stop brake fade before it starts. Contact us now to check our vacuum pumps which you are looking for and request the full installation datasheet for your vehicle. Start a live chat on our website for immediate technical support, send a WhatsApp for bulk order inquiries, or download our detailed product catalog. Subscribe to our weekly blog updates for more installation tips. Your safety is our business—reach out to ATOSPUMPS.